PF Tek Tutorial – How To Grow Shrooms
You may have seen the mysterious phrase ‘PF Tek’ dotted about the more shroomy corners of the internet. A popular topic on Reddit and other message boards— you’ve probably wondered ‘who are they?’, ‘is it some sort of cool new music trend I should know about?’ and ‘what colour is it?’ etc, etc. Well, never fear, because Wholecelium is here! Here to tell you everything you need to know about how to grow shrooms with PF Tek. But first of all, what the heck is PF Tek?
PF Tek actually stands for Psilocybe Fanaticus Technique. It was developed by Robert ‘Billy’ McPherson, an American fungus fan who went by the name Psylocybe Fanaticas, and shared his eponymous growing instructions with the world. First featured in High Times magazine in 1991, McPherson’s manual has spread across the globe, its simple and accessible method becoming a favourite with anyone mushroom-minded.
The aim of PF Tek is to grow mushrooms from scratch, at home, with a cultivation method that utilises relatively cheap and widely available materials. The most common types of mushroom grown by this method are probably our dear psilocybin shrooms. However, you can also grow the edible lion’s and shaggy mane mushrooms, as well as the uber-cool bioluminescent Panellus stipticus.

How can I grow you at home?!
OK, so now you know what you can do, it’s time to learn how to. This is our guide on how to grow shrooms with PF tek, based closely on the original instructions from Psilocybe Fanaticas himself.
Step 1: What You Will Need
- Glass jars (as wide-mouthed as possible so you can get the substrate cake out again.)
- Vermiculite (a growing medium, easy to find at your local garden or hardware store.)
- Brown rice flour (Can be found in supermarkets, especially the kind with a Whole Foods vibe)
- Bowl or mixing container
- Spoon
- Large pot OR pressure cooker (we will explain both methods)
- Sterilising flame source (a lighter, alcohol lamp, butane torch— a fire source you can use hands-free ideally)
- Clean water
- Aluminium foil
- Spore syringe
- Permanent marker
- Misting bottle
Step 2: Prepare The Substrate!
For this step you will need: vermiculite, brown rice flour, water, a bowl and a spoon.
The ratio you use is 2:1:1. So, that’s two parts vermiculite to one brown rice flour and one part water.
So for example, what you will need for one half pint (240ml) jar is 120ml of vermiculite, 60ml brown rice flour and 60ml of water.

Bet you’ve never needed vermiculite before…
The method:
- Pour your chosen amount of vermiculite in the mixing bowl.
- Gently add water while stirring with the spoon. You want the vermiculite to be soaked thoroughly but without excess water gathering in the bottom of the bowl. Stir constantly.
- After the vermiculite is damp, tip the bowl to the side. If excess water is visible, you have added too much. If you have, place the mixture in a sieve and let it sit until the excess has drained.
- When the vermiculite is wet, quickly add the required amount of brown rice flour. Mix it thoroughly. The aim is for the vermiculite to be totally coated with the flour. This means that every bit of your substrate will be fertile for the spore.
- Carefully spoon the mixture into your jars without pressing it down. The substrate has to be airy to grow mycelia most successfully. Fill the jar until 10mm from the top edge.
- Be careful not to get substrate on the edge of the jar. Smears or residue that is not part of the substrate can contain contaminants that could harm your Tek-ing. Wipe any smears away with a clean, damp cloth. Be a perfectionist!
- Use the remaining vermiculite to fill the jar to the top. This unmoistened layer will stop contamination from the air during inoculation and incubation.
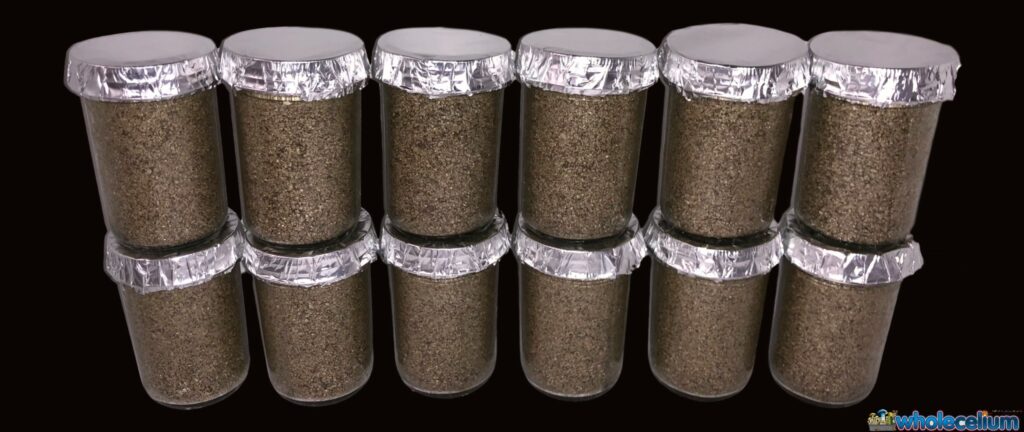
Time for a spot of jar-gazing
Step 3: It’s Time To Sterilise!
Get your aluminium foil and fold a piece in half. It should cover the top of the jar and down the side a bit. Scrunch the edges to seal the jar tightly, and make a secure lid. If you are using metal lids for your jars, make four holes spaced equally on the surface.
Next, get a second piece of foil, and put it over your foil or metal lid. Shape it so it fits snuggly, but you are still able to lift later for inoculation.
There are two sterilisation methods. The first requires a large cooking pot, you probably have one lying around in the kitchen cupboard. The second is slightly more specialised and calls for a pressure cooker— if you have one. Here we will cover both methods!
Method 1: Cooking Pot
- Put a round metal rack in your pot.
- Pour in 2.5cm of water.
- Carefully place the jars on the rack— do not rip the foil!
- Cover pot with lid and gently bring to the boil, keeping to a medium heat.
- Reduce heat down, and continue to boil gently.
- Allow to sterilise for 1.5 hours.
- Keep checking (aprox every 20 mins) the water level in the pot. As it is not tightly sealed like a pressure cooker, over time it will reduce. Top up when needed with pre-boiled water from the kettle.
- Turn off the heat and allow it to cool for at least 5 hours, or ideally overnight.
Method 2: Pressure Cooker
- Pour 2.5cm of water into the pressure cooker.
- Place jars inside— do not tear the foil!
- Attach the lid of the pressure cooker.
- Slowly, over 15 minutes bring the cooker to 15psi. Heating too fast could cause the glass jars to break.
- When the pressure rocker valve begins to release steam, lower the heat. Only the occasional light steam should be released.
- Allow to sterilise for 45 minutes.
- Turn off the heat, and let cool down slowly for a minimum of five hours or ideally overnight.
Step 4: Inoculation Station

Scrub those hands!
- Make sure your hands and workstation are sparklingly clean.
- Once your pot or pressure cooker has cooled down, remove the jars and place on the cleaned work surface. Have your flame source and spore syringe standing by.
- Give the syringe a gentle shake to break up any clumps of spores. If there is no space in the syringe barrel, put the needle in the flame and take a small bit of sterilised air into the barrel. Replace the cap and shake to disperse the spores. (Spore syringes are available online, or you can have a go at making one yourself.)
- Loosen your outer foil lid— this way you can remove it faster for inoculation.
- Take off your syringe cap and put the needle in the flame, heating until it glows amber. Let it cool. Do not touch!
- As you inoculate each jar, remove its outer foil lid. Do not remove all at once.
- If you have made a foil inner-lid pierce with your syringe at the very edge of the jar. If you have a metal lid, poke it through one of your pre-made holes. Make sure you go through the layer of dry vermiculite. Point your syringe towards the glass wall of the jar and inject 0.25ml of suspension (that’s your mushroom spore solution). The drop of suspension should run down the wall of the glass. Do this at four equally spaced points around your jar.
- Replace your outer lid.
- Sterilise your needle again!
- Repeat until you have inoculated all your jars. (Sterilise your needle each time!)
- Make sure all your outer foil lids are extra secure by crunching the edges down tight, so they will stay secure when you need to move the jars.
- Write your shroom species, and the date you Tek-ed, on each foil lid with a permanent marker.
(If you stopped at any point to do something else, make sure you re-washed your hands and sterilised the needle again.)
Step 5: Incubation Time!
Store your jars in a dark place, with a cosy temperature of between 21 and 27°C, (27°C is ideal if possible!) The warmer the temperature the faster the incubation and growth you will achieve.
Under ideal heat conditions, evidence of growth should appear in 3-5 days. The first clue is white specks on the vermiculite, these fluffy lil’ things are germinating spores. ‘White’ is key— green, pink or black means there has been contamination and an infection has begun. Throw the jar out. Do not try and re-use the jar. Try and work out where you went wrong in your sterilisation technique.
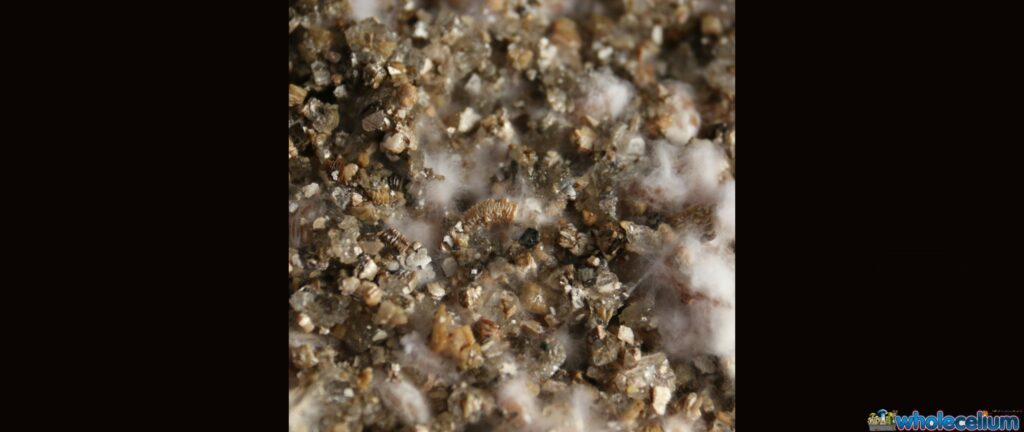
What you WANT to see
Ideally your mycelium should colonise the jar within 14-28 days. This largely depends on the temperature you incubated at, and the species of your spores.
Step 6: Beginning The Pinning
Once your jar is a mycelium city, it’s time to start pinning. Pins are the beginnings of mushroom growth. Keep jars at around 21°C and expose them to light for around 4-12 hours a day. This can be either artificial or natural light, as long as it is indirect.
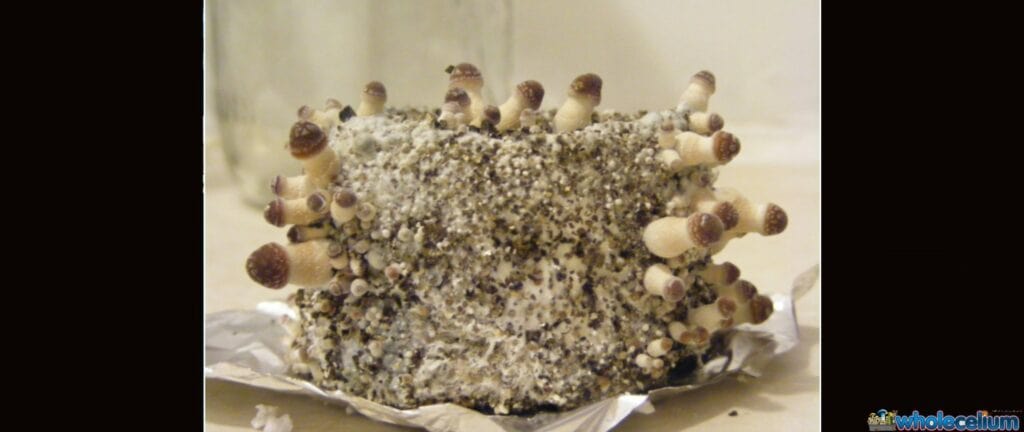
Pins can be identified within 5-10 days, however, this is species-based and it could take up to 30 days in some cases. Some people ‘shock’ their mycelium into pinning by wrapping their jar in a plastic bag and placing it in the fridge overnight. Once the pinning has begun you will see the tiny brown heads of baby mushrooms appearing.
The appearance of these tiny mushrooms means it’s time to remove your mycelium cake from its jar.
Step 7: Fruiting
Fruiting can take place in any container that can be sealed loosely and at least one clear or translucent side. This could be a large tupperware, a plastic bucket with a see-through plastic bag as a lid, an aquarium, etc.
Line your container with 1.5cm of damp vermiculite (alternately you can layer wet paper towels), and birth the cakes by turning the jar upside down and letting them gently slide out.
If you are having trouble removing your cakes, replace the lid and GENTLY tap the underneath of the hand holding the jar with your other hand. DO not damage the tiny shrooms.
If your fruiting container is housing more than one cake, make sure they are at least 2.5cm apart from each other.
Once all your cakes have been born replace the lid of your container.
Ensure your bottom layer remains moist. If it is drying out, dampen it with a misting bottle, avoiding the cake and the little shrooms. Open your container once a day and fan fresh air into it.
I guess it’s kinda cute?
Now it all kicks off! Your baby shrooms should start to become real mushrooms over the next 7-10 days. This is your first ‘flush’. When the caps begin to open— it’s harvest time!
Step 8: Harvest Time!
Clean your hands and gently twist and pull the mature mushrooms out of the cake. Any smaller mushrooms should also be harvested too— everything must go. As long as they are not rotten they are good to use.
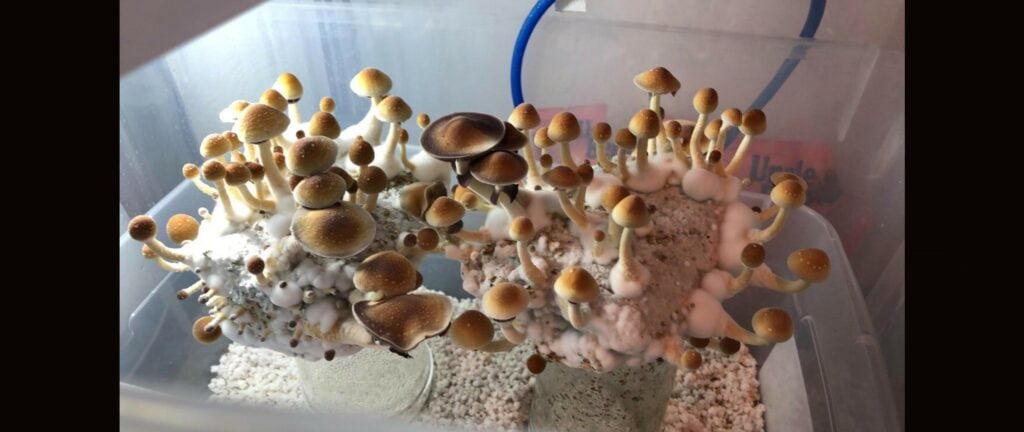
One of the many successful Teks you can find on reddit
Step 9: Keep On Flushin’
Your initial flush will be your largest, but you can expect more from your cake. After harvest, moisten your cake again and repeat fruiting instructions. You could get up to four flushes from each cake! Once your cake has been exhausted, you can plant it in your garden— you may get outdoor flushes!
Another method used by more seasoned Tek-ers is dunking. This can greatly increase the yield of your later flushes. After harvesting your first flush, submerge your cake in clean water for 12-24 hours. After you dunk, drain and gently pat dry with a fresh paper towel. Return it to its fruiting chamber and continue as before. Repeat this method at each subsequent flush.
So there you have it! All you need to know to do the PF Tek.
Pssst! We Have A Life-Hack For You!
However, if this seems like rather a lot of time and effort (success rate on average is 50% ) —we have the answer! Our magic mushroom grow kits give you a bountiful harvest without all the messing around with syringes and gardening materials. Although PF Tek is of course an art— and a triumph for any shroom-fan— if you want an easy way to grow fresh magic mushrooms, Wholecelium is here to help you with our fool-proof kits. Not only are the spores pre-germinated but they come ready in their own fruiting chamber. It’s a no-brainer!